The group as a whole worked really well together, supporting each other when needed and accepting each others strengths and weaknesses. I am proud of the animation which we created and feel that the hours of work have been worth it. Although I do feel that more time should have been given to us to complete this project as there are certain parts to the animation that would have benefited from not being rushed.
I feel I was the weak link within the group but I did try to support and work as hard as I could to make up for this. I have gained many more skills within 3D Max with the help of my group members and towards the end of the assignment began to enjoy the modeling aspect where as before it felt like a chore.
I hope that Des and Jacquie are pleased with the work we have created.
Thursday, 8 December 2011
Shop Scene
As a group we knew where our strengths and weaknesses lied. All of us were happy to admit where we would not do as well. In my case animation was my major weakness.
Although the group knew this they were still happy for me to help with the creation of this scene. This was something that I really appreciated as the experience was invaluable. Unfortunately due to work commitments I was unable to help more with the animation but below is the shop scene:
Shop Pen
Whilst waiting for something of Alex's to render I decided to make a pen for the shop desk. It started as a simple cylinder and cone. I extruded the inner ring of the cylinder to create a nib for the pen. I also extruded some side polygons to give the image of it having a lid. The top of the cylinder was chamfered to bring the lid section to a point. A material was added which was a picture of The Guildhall:
Card Machine
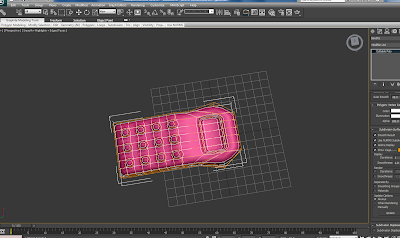
Every shop needs a card machine so I decided to add one to ours. The machine started out as a box which I edited to give more shape to the top as this is where the screen would sit. I selected every other polygon on the main section and extruded them so that they looked like raised buttons.
I wanted to give the machine some shape so I slightly bent and rotated the mid section, much like I did with the fingers in my hand. I then went on to select the polygons within the top part which had been modified for the screen. These were inset and inverted as with the computer screen.
Biped Attempt
My skills in 3D Max are limited but there were a few things I wanted to try. In our scenes Des is walking through the Guildhall, opening doors as he goes. I wanted to try and use a biped with my hand to make the hand open the door. I searched for a tutorial which may help with my understanding of how it works as they are the best way for me to learn.
After spending several hours trying to get the hand to move I had to give in as I was getting no where fast and time was not on my side. After talking with the group they agreed that this was ok.
The following images are screenshots from my attempts:
After spending several hours trying to get the hand to move I had to give in as I was getting no where fast and time was not on my side. After talking with the group they agreed that this was ok.
The following images are screenshots from my attempts:
I was really disappointed in myself that I was not able to grasp the concept of how this worked and it still bugs me that I did not complete it as I feel the animation would have benefited from it.
The Shop
It was agreed that I would model the assets within the shop. It was shocking how small the shop area was and it was because of this I new I would have to limit what was put in there. The first thing that I felt was important to add was the shops desk/till. I created this by creating two boxes and merging them together. I then converted them to editable polys and deleted the polygons which were the back of the desk giving space for someone to be sat there. I then extruded the left hand ledge under the desk so that the till drawer could sit underneath.
After completing the desk I went on to create the till drawer. This was a rectangular box which I modified as an editable poly. I inset the front polygon and extruded this out a little further than the main object as this was to show the drawer within the till.
Next to the till I started to create the monitor for the touch screen till. Again this was made up of several boxes and converted to and editable poly. The front box where the screen would be was inset and inverted as a real computer screen would be.
After creating the desk and till I needed to move on to the desk chair. I wanted the desk chair to be more than a box as it started to feel as though every model started life as a box. I decided to look on youtube for some tutorials and found one which I chose to use: http://www.youtube.com/watch?v=A8ha8SrI1GA&feature=related
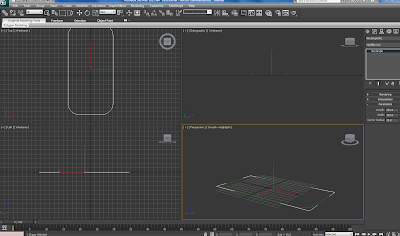
To create the chair I drew a rectangular spline and in modify I changed the colour and dimensions. It was here that I also altered the corner radius to give the chair some shape. I went on to turn this into an editable spline, selecting the middle segments I divided the geometry and edited this section within the transform type-in I changed the amount in the x offset which made the sides bend inwards.
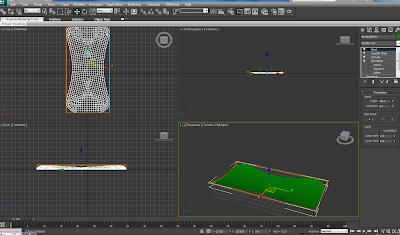
I then applied an extrude and quadify mesh modifier which gave a smooth depth to the object. I went on to add a bend modifier and adjusted the angle of the x axis so that the object bent in towards itself.
By adding another bend modifier I was able to apply and angle and direction to the y axis, bringing the chair uo and giving it a back, the upper and lower limit was also edited. I then applied a Turbosmooth modifier.
To add the legs to the chair I used a line spline to create one side. I then changed the colour within modifier and gave them more thickness. Using the Top view I aligned the legs to one side and mirrored the spline along the x axis.
I think making the chair was the most enjoyable asset to create. I was really pleased with the outcome and the tutorial was clear to follow.
Wooden Bench
I created the wooden bench by using the box selection within standard primitives for the back and sides. The bench was made to go into the Hall. In the picture there showed a fin type support which was also created in the same way. I chamfered the edges of the bench as this is how it appeared in the image from our visit.
Simple Charity Box
The charity box was the easiest of assets that I made. As it was to just sit in the entrance wall I made a box and applied the material from pictures that were taken on our Finchingfield trip.
Door Knocker
The door knocker was made up of several different shapes merged together. I started with the knocker part of the door knob, this was created using aTorus within standard primitives. I then moved on to the box which hinged the knocker to the main object. From here I used several layers of cylinders. I then went on to apply a material to the door knocker.
Candlestick
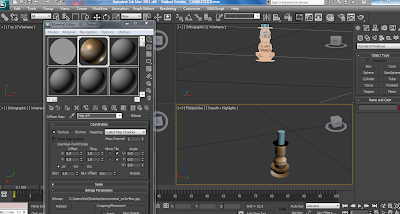
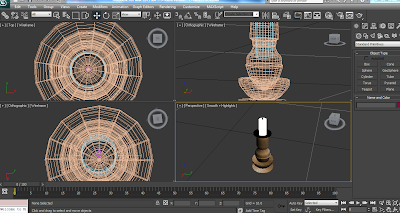
To create the candlestick I loaded an image into Adobe Illustrator and traced around the outline using the pen tool. I only traced half of the outline as once this was loaded into 3D Max I would modify it. After loading the outline into 3D Max I used a lathe modifier to create the base of the candle stick. I then went on to manipulate the object to make it look more realistic.
I added the candle with a simple cylinder which was placed through centre of the object. Materials were added.
I added the candle with a simple cylinder which was placed through centre of the object. Materials were added.
Subscribe to:
Comments (Atom)


